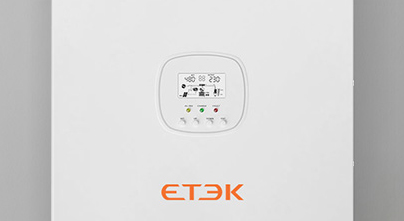
Connecting a 12V inverter to a solar panel is a practical way to convert the direct current (DC) electricity generated by the solar panel into alternating current (AC) electricity, which can then be used to power various household appliances. Here's a step-by-step guide on how to do it
Step 1: Gather the Necessary Equipment
You will need a 12V solar panel, a 12V inverter, a charge controller (preferably a PWM or MPPT charge controller), appropriate cables with connectors, and a battery (if you plan to store the energy for later use).

Step 2: Understand the Components
Solar Panel: The solar panel is responsible for converting sunlight into DC electricity. It has a specific voltage and current rating. For example, a common 12V solar panel might have a power output of 100 watts, which means it can produce a certain amount of current depending on the sunlight intensity.
Charge Controller: This device is crucial as it regulates the charging of the battery (if used) and prevents overcharging and over-discharging. A PWM (Pulse Width Modulation) charge controller is more basic and cost-effective, while an MPPT (Maximum Power Point Tracking) charge controller is more efficient and can extract more power from the solar panel, especially in less than ideal sunlight conditions.
12V Inverter: The solar inverter converts the DC power from the solar panel (or battery if connected) into AC power. There are different types and sizes of inverters, with power ratings ranging from a few hundred watts to several kilowatts. It's important to choose an inverter that can handle the power requirements of the appliances you plan to use.
Step 3: Make the Connections
Connect the solar panel to the charge controller. The positive wire from the solar panel should be connected to the positive terminal of the charge controller, and the negative wire to the negative terminal. Make sure the connections are tight and secure to avoid any loose connections that could cause power loss or even a fire hazard.
If you have a battery, connect it to the charge controller following the same positive-to-positive and negative-to-negative wiring. The charge controller will manage the charging and discharging of the battery to ensure its longevity.
Now, connect the output of the charge controller to the input of the 12V inverter. Again, pay attention to the polarity and ensure proper connections.
Q: Why is a charge controller necessary when hooking up a panel to an solar inverter?
A: A charge controller is essential because solar panels generate electricity based on sunlight intensity, which can vary throughout the day. Without a charge controller, the battery could be overcharged when there is excessive sunlight, leading to reduced battery life or even damage. Additionally, it prevents the battery from over-discharging, which can also harm the battery's performance. The charge controller ensures that the battery is charged and discharged within its optimal operating range, thus maximizing its lifespan and the overall efficiency of the solar power system.
Q: What are the benefits of using a 12V inverter compared to other voltages?
A: A 12V inverter is commonly used because it is compatible with many off-grid solar power systems that operate on 12V batteries. It is relatively easy to set up and is suitable for powering small to medium-sized appliances. Additionally, 12V components, such as batteries and solar panels, are widely available and more affordable compared to higher voltage systems. However, for larger power requirements, higher voltage inverters (e.g., 24V or 48V) may be more efficient, but they also require more complex and expensive equipment.
Once all the connections are made, you can start using the AC power output from the inverter to power your electrical devices. It's important to monitor the system regularly to ensure it is operating properly and to make any necessary adjustments or maintenance. With a properly installed solar panel and inverter system, you can enjoy clean and renewable energy for your daily power needs.
GET A QUOTE